יום רביעי, 21 בדצמבר 2011

the easiest pasta bolgnese you'll ever make


This fabulous, delicious and rediculously easy recipe comes with a story that takes us back to my no-vegetable eating chocolate craving days (wait a minute-wasn't that yesterday??) aka my childhood.
Mom, terrific cook that she is, caught a bad case of sinusitus (to be honest-not quite sute there is such thing as a good case of sinusitus but you get the picture) and really couldn't make one of her famous fancy meals. She came across this recipe which I think was called "one pan goulash" and the rest is history-It's still one of our favorite dishes. In honor of Mom's previous illness, we found ourselves calling it "sinusitus noodles". Dad gets really embarrassed when we call it that in front of company but old habits die hard. So now if you find yourself nursing German measles,swine flu or anything else that makes you want to wham your head into a wall, just try this dish.I can't promise that it'll cure but you can't take that antibiotic on an empty stomach, can you?

Ingredients:
1 package of short pasta-penne or whatever you have around the house (yeah, you can use spaghetti but I've found that the meat distributes itself better when you make it with short pasta.Go figure)
1 lb.\500 grams of ground turkey (ground beef can work too but I think it tastes better with poultry.Again, go figure)
2 cups of water
1 cup of tomato paste
1 tablespoon of onion soup powder

1. Make the pasta according to the manufacturers instructions
2.In a wok or large frying pan (keep in mind that you'll eventually be transferring all of the pasta into it, so be prepared) heat 1 teaspoon of oil and brown the meat until it turns white and starts to brown.
3. Add the water, tomato paste and onion soup powder, mix and let simmer on a low flame for 5 minutes.
4.Drain the pasta and add it to the pan.Mix, cover and let simmer for another 15 minutes.

Enjoy!

יום ראשון, 4 בדצמבר 2011

פסטה בולונז ב-5 מרכיבים


נכון שקונספט ה"ארוחה בסיר אחד" הוא קצת חרוש, אבל בימים טרופים אלו, שהשגרה בעיצומה (וגם הדיאטה שלנו,למקרה שתהיתם...) חייבים שיהיה משהו טעים, מהיר ומחמם בכמה שפחות כלים. (בעלי ציין לאחרונה שהוא רוצה לקבל פרס נובל על כמות הכלים שהוא עושה. אופס!) כמו כן כדי שזה יהיה מזין למדי. לכן אנחנו משתמשים פה בעוף טחון במקום בבקר,ותתפלאו כמה טעים זה יוצא ובלי לשים לב אתם מחסלים חצי סיר (מי אני? אני בדיאטה, לא? ירדתי כבר שני ק"ג אז מותר לי,נ כון?...לא,  הא?)
בכל מקרה, נורא כדאי לכם להכין את הבולונז הלא-כל-כך-אותנטי אבל מאוד-מאוד-טעים הזה.

מרכיבים:
חבילת פסטה קצרה (פנה,פרפרים או מה שבא לכם.אם יש לכם רק ספגטי כמובן שזה גם עובד אבל העוף נוטה להתחלק בצורה שוויונית יותר בין הפסטה כשהיא קצרה.פיזיקאים רבים עובדים על הסיבה המדויקת לכך אבל באנו לאכול, לא?)
חצי ק"ג עוף או הודו טחון (אפשר גם בקר אבל כאמור לטעמי זה יוצא יותר טעים ככה).
2 כוסות מים
כוס רסק עגבניות- יוצא בערך 2 חבילות קטנות (100 גרם כל אחת) של רסק
 כף אבקת מרק בצל

1. מכינים את הפסטה לפי הוראות היצרן ומסננים
2.במחבת גדולה, ווק או סיר שטוח (זה צריך להכיל את כל הפסטה,
   אז תיערכו מראש) מחממים מעט שמן ומטגנים את העוף עד
   שהוא לבן ומתחיל להשחים. 
3.מוסיפים את המים, הרסק ואבקת המרק.
   מערבבים ומניחים לרוטב לבעבע במשך 5 דקות.
4. מוסיפים את הפסטה המסוננת לרוטב ומניחים לה להתבשל
    בבעבוע עדין במשך רבע שעה.

קלי קלות, וטעים כל כך...
בתאבון!


Super fast peanut butter cookies


So there's good news and bad news.
The good news is that D, my SIL is engaged and we're all supr excited for her.
The bad news is that with a family wedding approaching we (as in DH and yours truly) have no excuse not to go on a diet.
Sigh.
So here we are, eating low-cal bread and rice cakes and dreaming of those carefree days when cake was considered a friend and a scale was a foreign object.Do I sound a little off?maybe my body is attacking my brain cells instead of the fat cells that it is supposed to attack.
But hey, there's no reason that you should suffer along with me.So here's my moms recipe for these incredible cookies that don't have any flour but melt in your mouth and are downright incredible.
(D did the styling here, and MIL gets the credit for the pictures.Just thought you should know).


Ingredients:
1 cup of peanut butter (smooth\creamy, not chunky)
1 cup of sugar
1 egg
1 teaspoon of baking soda

1.Mix all of the ingredients in a bowl
2. Cover a baking sheet with greased baking paper and drop walnut-sized balls of cookie dough on it.Make sure to leave some space between the cookies-they will flatten and spread out while baking
3.Bake at medium heat (350 F, 180 C) for about 10 minutes, or until edges of cookies are golden.Keep a close eye on them because they burn fast-don't say I didn't warn you!

Save me one, OK?this diet has to end sometime...

יום חמישי, 17 בנובמבר 2011

עוגיות חמאת בוטנים מהירות


אז אנחנו בדיאטה.
נאבקתי בזה המון זמן, ניסיתי להתכחש לזה וכל הזמן ניסיתי לשכנע את עצמי ש "זה שאני רודפת אחרי הנסיך הקטן זה שורף המון קלוריות, לא?"  לפני כן יכולתי לדחות את זה בתירוצים של  "אני עדיין מניקה" ו "אחרי החגים", אבל הגיעה שעת האמת. היום הלכתי לסופר וקניתי חסה, פריכיות, חלב 1% ולחם קל (אבל הלבן, כן?הקו האדום שלי זה הלחם שמצופה בגרעינים וזרעונים ונראה יותר כמו עציץ מאשר משהו שאני באופן וולונטרי אכניס לפה שלי.יש גבול). והקופאית הסתכלה עליי במבט מלא רחמים והלכה לנשנש נשיקולדה (כן, גם הפייסבוק שלי מוצף בקריאות אושר על כך שהממתק הרטרו עושה קאמבק היסטורי היישר למדפי הסופר. מי ייתן ואוכל גם אני יום אחד להתענג על שחיתות מעין זו).לא, זאת לא פרנויה-פשוט במקום לאכול את תאי השומן הגוף שלי החליט לנגוס בתאי השכל והעצבים.
אז כפי שאתם רואים, לא קל להיות בדיאטה, במיוחד לא כשכמות לא מבוטלת מהיום שלך מתכלה על הצצות בבלוגים ופורומים למיניהם של מתכונים-שלא נדבר על בישולי השבת. אבל כמובן שהדיאטה, קשה ככל שתהיה, היא לא סיבה לקפח אתכם, קוראיי הנאמנים (היי אימא) ואין שום סיבה שלא אשתף אתכם,בפולניות יתרה, במתכון נהדר וקליל-קליל לעוגיות שנמסות בפה ולוקחות ממש כלום זמן להכין.
אבל תשמרו לי אחת, טוב? לימים יפים יותר.


המתכון כאן מהווה מיזוג משפחות של ממש: מתכון של אימא (הפעם לא נגעתי בו,הוא מושלם כמו שהוא), צילום של חמותי ואת הסטיילינג של העוגיות (=החריטה והשוקולד) עשתה גיסתי.

מרכיבים:
כוס חמאת בוטנים חלקה
כוס סוכר
ביצה אחת
כפית סודה לשתייה

1. מערבבים את כל המרכיבים בקערה.
2. מכסים תבנית אפייה בנייר אפייה משומן ומניחים עליו כדורים בגודל של אגוז מלך. שומרים על רווח בין העוגיות כי הן ישתטחו ויתפשטו.
3. אופים בחום בינוני (180 מעלות)במשך כ-10 דקות, עד ששולי העוגיות מזהיבות.תשגיחו עליהן, הן נשרפות מהר.


אני מודה שאפייה ללא גלוטן זה לא התחום החזק שלי (חוץ מאשר בפסח, כמובן) ויכול להיות שיש גלוטן בחמאת בוטנים אבל
מי שמחפש מתכון ללא גלוטן -הגעתם למקום הנכון!

יום חמישי, 10 בנובמבר 2011

Stir-fried mushrooms with garlic and herbs


I think I've mentioned my picky food issues here before.It's actually embarrassing to admit just how many foods I won't eat so I'm not even going to try and list them.Maybe it's genetic, because pretty much every one of my immediate family members has the same issues- and this is before allergies come into the picture.DH, however, is definitely NOT a picky eater and he will eat pretty much anything you will put in front of him.There are, however, a few select items that DH would prefer not to consume on a regular basis and one of them is mushrooms.Of course, Murphy dictates that mushrooms are a food that I happen to really like but in a three person household-one of whom is a toddler who has a love\hate relationship with most foods and can decide one day to wolf down tremendous quantities of x edible tidbit,even though the previous day he didn't go near it- there's really no point in making them.Unless there are guests.Then I can go as mushroom- crazy as I want.So here's a recipe that has been developed between one meal of "wow, you're having how many people over for dinner?" to another.


Ingredients:
1\2 lb. (one small basket.Or just make two, they disappear fast) of fresh mushrooms, I prefer champignon
2 tablespoons of olive oil
one small diced onion
3 chopped garlic cloves
1\4 cup of chopped parsley
1\4 cup of chopped dill
(I often substitute 1 tablespoon of dried parsley and one tablepoon of dried dill for the fresh herbs)
1 tablespoon of dried oregano
salt and black pepper to taste

1. Wash the mushrooms and slice
2. Fry the onion in the olive oil until golden.Add the garlic and continue until garlic softens but doesn't burn
3. Add the mushrooms and cook for a few minute, until the mushrooms soften and start shrinking a little 
4. Add herbs and spices and mix.Continue cooking for about 10 minutes, until the mushrooms are completely soft and the liquid has evaporated

Yummy! eat them cold, hot, on bread or directly from the bowl...


The photography credits go to my MIL!thanks!

יום ראשון, 6 בנובמבר 2011

פטריות מוקפצות בשום ועשבי תיבול


חורף, הא? סוף סוף הגשם כאן במציאות ולא רק פנטזיה. חורף הוא  זמן בו מרפי שולט יותר מאשר כל השנה. לפעמים יום שלם אין גשם ואז בדיוק  כשאתם צריכים להוציא את הזבל -בום!- מבול שלא היה מבייש את נוח והחבר'ה שלו. או שנתקעתם בלי מטרייה, או שיצאתם עם מטרייה אבל יש יותר רוח מגשם והמטרייה הפכה לשלד שבור. אבל אתם זוכרים שאני אוהבת חורף,נכון?אני לא נותנת לכמה טיפות מסכנות להרוס לי את  המצב רוח ומעדיפה להתנחם במשהו טעים ומחמם ולא להתגעגע לימות חמסין דביקים. אולי סלט חמים ומרענן של פטריות מוקפצות?


מרכיבים:
סלסלת פטריות טריות,אני ממליצה על שמפיניון (בינינו, תכינו שתי סלסלאות ותכפילו את הכמויות של שאר החומרים.מניסיון, זה נחטף מהר והפטריות מתכווצות בהקפצה).
2 כפות שמן זית
בצל קטן קצוץ
3 שיני שום קצוצות
רבע כוס פטרוזיליה קצוצה
רבע כוס שמיר קצוץ
(אפשר להמיר את עשבי התיבול הטריים בכף פטרוזיליה יבשה וכף שמיר יבש)
כף אורגנו יבש
מלח ופלפל שחור לפי הטעם

1.שוטפים את הפטריות ופורסים אותם
2.מאדים את הבצל בשמן עד להזהבה ומוסיפים את השום (נזהרים שהוא לא ייחרך)
3. כשהשום מתחיל להזהיב, מוסיפים את הפטריות ומקפיצים במשך מספר דקות, עד שהן מתחילות להתרכך.
4. מוסיפים את עשבי התיבול המלח והפלפל ומערבבים. ממשיכים לבשל עד שהפטריות רכות ומתכווצות והנוזלים מצטמצמים (בערך 10 דקות).

בתאבון!מצוין חם או קר, על לחם או ישירות מהקערה...

שיהיה חורף בריא! (פטריות זה בריא, לא?)


יום חמישי, 27 באוקטובר 2011

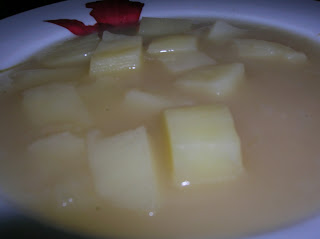
Potato soup


The world is supposed to divide into summer people and winter people, but to me it seems that most of the time I'm the only winter person around and that most people would rather peel their sunburnt skin off than watch the rain come down.Whatever.I guess that means that I'm the only one who really wants the winter to show up already and stop beating around the bush.Care to join me?The best way to do so is to make a big pot of soup- though, come to think of it, I tried doing that in August and the weather was...well, August-y.In that case, stick to the air conditioning...or eat the soup cold!

This is yet another great recipe from Moms kitchen.I love it because I almost always have the ingredients on hand.Oh, and the main ingredient is potatoes-do I need to say more?

Ingredients:
1 large onion, chopped
2 tablespoons of flour
3-4 peeled and cubed potatoes
6 cups of water
half a tablespoon of salt
half a tablespoon of chicken soup powder
black pepper to taste

1. In a big pot, brown the onion in a tiny bit of oil .
2.Sprinkle the flour over the onion and stir until the oil is absorbed into the flour
3.Add the potatoes and water.Cover the pot and lower the flame
4.Cook the soup for 30 minutes or until the potatoes are soft.Add the spices 5 minutes before turning off the flame.

Have a great winter!

יום שני, 24 באוקטובר 2011

מרק תפוחי אדמה


העולם אמור להתחלק לאנשים שאוהבים קיץ ואנשים שאוהבים חורף אבל איכשהוא נדמה לי כל שנה מחדש שיש הרבה יותר אנשי קיץ שאוהבים ללכת לים ולחזור עם עור אדום ומתקלף מאנשים שאוהבים להדביק את האף לחלון ולראות את הגשם יורד.למקרה שעוד לא הבנתם,אני לגמרי ממוקמת בקבוצה השנייה ושרויה במשא ומתן להגעת החורף כבר מאמצע יוני בערך.רוצים להצטרף אליי? אחת הדרכים שנמצאו כיעילות ביותר להבאת החורף הן פשוט להרתיח סיר גדול של מרק ולאכול אותו בהנאה גדולה.מצד שני,ניסיתי את זה גם בסוף אוגוסט וההמשך ידוע.במקרה כזה,הצטיידו במזגן חזק או שאפשר פשוט לאכול את המרק כשהוא קר...


המרק הזה הוא עוד מתכון מוצלח ממטבחה של אימא,ואני אוהבת אותו כי כמעט תמיד יש לי את כל המרכיבים שלו בבית.אה,והוא מכיל בעיקר תפוחי אדמה-צריך יותר מזה???

מרכיבים:
בצל גדול קצוץ
2 כפות קמח
3-4 תפוחי אדמה קלופים וחתוכים לקוביות לא גדולות מדי
6 כוסות מים
חצי כף מלח
חצי כף אבקת מרק עוף
פלפל שחור לפי הטעם

1. בסיר גדול מטגנים את הבצל מעל חום בינוני-גבוה במעט שמן עד שהוא משחים
2.מפזרים מעל הבצל את הקמח ומערבבים היטב.
3.מוסיפים את תפוחי האדמה והמים,מכסים את הסיר ומנמיכים את האש.
4.מניחים למרק להתבשל כחצי שעה או עד שתפוחי האדמה רכים.מדי פעם בודקים שהוא לא גולש ו-5 דקות מוסיפים את התבלינים

שיהיה חורף גשום ובריא!

יום ראשון, 23 באוקטובר 2011

Roasted pepper spread


So here we are, back to the routine-which for a lot of you out there means endless days of  work or school.Oh, and maybe a few crunchy leaves to step on because fall is in the air (and on the ground).Remember a few years ago there was this phase on Facebook where people felt the need to create a group for absolutely anything they could think of, regardless of how random and useless it was?(raise your hand if you think that era has yet to pass).One of those groups that I recall was "I go out of my way to step on an extra crunchy leaf"-what the heck?do you feel good knowing that other people go out of their way to step on those crunchy leaves?do you feel a special bond between you and those people who live half across the globe and other than your leaf-crunching habit you have absolutely nothing in common?or do you feel threatened knowing that there are other people seeking the same leaves you step on and if you're not careful all you will ever find is a pile of already-crunched on leaves?ARG!
For those of you who need their fall days to be a little more interesting than some crunchy leaves and\or a random Facebook group,try this yummy spread.My motto is:if it tastes good on a rice cake, it'll taste good anywhere.

Ingredients:
3 red peppers
3 peeled cloves of garlic
2 tablespoons of olive oil
1 tablespoon of lemon juice
1 teaspoon of sweet chili sauce
2 tablespoons of mayonnaise (I like to use the oil based low fat mayo and get my fat intake from something more important.Like ice cream)

1.Cover a cookie sheet with aluminum foil,wash the peppers and place them on the covered cookie sheet.Heat the oven to 400 F or 200 C and roast the peppers until they begin to blacken on all sides (this takes about 45 minutes)
2.Remove the peppers from the oven and place them in a clean plastic bag.Knot the bag and let the peppers "sweat it out" for about 30 minutes.This will enable you to peel them easily
3.Remove the peel, seeds and whatever else doesn't do it for you.Place the peeled pepper chunks in the food processor.
4.Add the rest of the ingredients and process until smooth


Spread it on some crackers, fresh bread, focaccia or of course...rice cakes!
Have a great crunchy fall!

יום שני, 17 באוקטובר 2011

ממרח פלפלים קלויים


אין ספק שחג סוכות הוא אחד החגים האהובים מבחינתי,אבל שמתם לב שמדובר בערך בחג היחיד שאין לו מאכלים אופיניים?תמוה,הא?אני די משתעשעת מכך שרוב עם ישראל מוכן לחרף את נפשו בשביל סופגניה נוטפת שמן בחנוכה או אוזן המן בגודל של דירת 5 חמישה חדרים בפורים (או בחודשיים שקודמים לשניהם) אבל לסוכות עוד לא מצאנו מאכל שרשתות השיווק יכולות לעשות עליו קופה וזה מבחינתי עוד יותר טוב: בסוכות,חג האירוח האולטימטיבי,אתם מוזמנים להכין את מה שהכי כיף,נוח,קל או טעים לכם להכין!תוציאו מתכון של סבתא מהבוידם,או תאזרו אומץ ותנסו משהו חדש שנראה לכם מגניב אבל קצת היססתם עד עכשיו-לכו על זה!
ואם בא לכם מתכון טעים נורא שמושלם למרוח על כריכים ולצאת לטיול,או אפילו על פריכיות אורז לאלו מכם שהקדימו את דיאטת אחרי החגים ל-איך לאמר?-החגים עצמם (תסמכו עליי-כל דבר שיוצא טעים מרוח על פריכית יהיה טעים על כל דבר אחר).זה אומנם לא מתכון של הרגע האחרון אבל הוא מורכב מחומרים זמינים ורוב הזמן אתם רק מחכים לפלפלים ולא מתעסקים איתם בפועל.תנסו ולא תתחרטו!

מרכיבים:


3 פלפלים אדומים

3 שיני שום קלופות

2 כפות שמן זית

כף מיץ לימון

כפית רוטב צ'ילי מתוק

2 כפות מיונז (אני אוהבת להשתמש במיוקל 5%)


אופן ההכנה:

1.שוטפים את הפלפלים ומניחים אותם על תבנית אפייה מכוסה בנייר אלומיניום.
מחממים את התנור לחום גבוה (200 מעלות) וקולים את הפלפלים עד שהם משחירים (45 דקות בערך).

2. מוציאים את הפלפלים מהתנור ומעבירים אותם בזהירות לשקית פלסטיק נקייה.
מניחים להם להצטנן במשך כחצי שעה.

3. מסירים את הקליפה,את העוקצים ואת הגרעינים ומעבירים את "בשר" הפלפלים למעבד המזון.
מוסיפים את שאר החומרים.


בתאבון וחג שמח!תספרו לי איך יצא!


יום חמישי, 6 באוקטובר 2011

Apple Cake surprise


So we're already into the new year, but in my humble opinion any time is appropriate for a nice warm slice of apple cake. Apples and cinnamon are probably one of the best aromas you can fill your house with, and this one is especially fun because it has a sneaky ingredient.You'll never guess what it is.Okay, maybe you will if you read the post in Hebrew so for the rest of you I think I'll just come clean.
The secret ingredient is mayonnaise.
EEWWWWW!!!!GROOSSS!!!!!!what the heck is she thinking?
Now those of you who have read my carrot kugel post (hi Mom) know that freaky food combos are NOT my cup of tea, but sometimes curiousity kills the cat and I just had to try this recipe when I came across it (the fact that I had mayonnaise to get rid before the expiration date may have been a contributing factor.How much tuna salad can one person possibly eat without dying of mercury poisoning???).Needless to say, you obviously canNOT taste the mayonnaise and it simply acts as a fat similar to oil.This is my revised version of a really moist, easy and fairly low-fat cake.Why don't you try it out yourself?


Ingredients:
1.5 cups of flour
1 teaspoon of baking soda
1 teaspoon of baking powder
1 cup of sugar
1\2 a cup of mayonnaise (I really recommend using the low-fat mayonnaise that is based on oil.It'll save you a whole lot of fat)
4 tablespoons of milk (or soymilk)
2 eggs
1 teaspoon of cinnamon
pinch of salt
5 tablespoons of lemon juice (that's about one lemon, but don't be a snob- I used bottled lemon juice and you can too)

Fot the apple topping:
 2 apples, peeled and sliced or cubed
3 tablespoons of sugar
1 teaspoon of cinnamon

1.Grease a round or square pan and heat the oven to 180 C or 350 F
2.Combine all of the cake ingredients and pour batter in to the greased pan
3.Place the apple slices on top of the batter, combine the remaining cinnamon and sugar and sprinkle on top of the apple slices
4.Bake for 45 minutes, or until cake is golden and a toothpick comes out clean.Apple cakes sometime look done on top before they are actually baked through so you may want to place a sheet of foil over the cake in order to ensure even baking and to avoid burning


Enjoy...I told you that you wouldn't taste the mayonnaise


יום שני, 5 בספטמבר 2011

עוגת תפוחים קלילה ונימוחה עם טריק


אין כמו החזרה ללימודים כדי להזכיר לכולנו שהחגים בפתח ולהכניס למתח...אני מודה שעד עכשיו לא התעקשתי להיצמד למתכוני חגים כאן בבלוג אבל לקראת השנה החדשה אני אשתדל לתת גם לזה מענה כדי שבעוד כמה שנים גם בבלוג הזה נוכל לעשות תוית של "מתכונים לראש השנה" ובו 800 פריטים.חתיכת new years resolution, הא?
מכיוון שאני לא מתה על עוגות דבש באופן כללי (אל דאגה,ראנט עצבני ומסודר יבוא בפוסט אחר),קינוחי החג מתרכזים בדרך כלל בתפוחים-וזה סבבה,כי מבחינתי תפוחים וקינמון הם אחד השילובים המנחמים והטובים ביותר שיש לעולם הקינוחים להציע (ויש לו המון!). את המתכון הזה גיליתי לפני כמה חודשים,כשקיבלתי מאימא את הספר "בישולה" ליומולדת.אחלה ספר ואחלה מתכונים אבל הוא, בדומה לספרי בישול רבים וטובים, חוטא בכך שהוא אינו מסתפק בפחות מ-200 גרם חמאה ברוב הקינוחים שלו. קוראים ותיקים בבלוג (היי אימא) יודעים שזה משהו שאני נוטה לא לעשות,ולכן נחו עיניי על מתכון לעוגת תפוחים עם מיונז.
מה??????????
אלו מכם שקראו את פוסט העוגת גזר שלי יודעים שעוד דבר שלא עושה לי טוב זה שילובים של דברים מהעולם החיצון אל הקינוחים המקודשים שלי,ולכן הגיוני שלא אסתכל אפילו על מתכון למיונז בעוגה אבל משום מה זה נורא סיקרן אותי וניסיתי בכל זאת.התוצאה הייתה טובה מאוד והנה המתכון לפניכם בתוספת שינויים שלי:


מרכיבים:
1.5 כוסות קמח
1 כפית סודה לשתייה
1 כפית אבקת אפייה
1 כוס סוכר
2\1  כוס מיונז (הקטע המגניב פה זה שאני השתמשתי במיוקל 5% וזו מן הסתם לא היייתה כוונת המשורר.ככה חסכתי המון שומן על הדרך וגם אתם יכולים)
4\1 כוס חלב או חלב סויה
2 ביצים
1 כפית קינמון
קורט מלח
5 כפות מיץ לימון

לציפוי תפוחים:
2 תפוחים קלופים וחתוכים לקוביות
3 כפות סוכר
1.5 כפיות קינמון

1. משמנים תבנית עגולה בקוטר 26 ס"מ בספריי שמן (או שמשתמשים כמוני בתבנית סיליקון וחוסכים גם את השומן הזה) ומניחים אותו בצד,מחממים את התנור לחום בינוני 180 מעלות.
2. מערבבים היטב בקערה את כל חומרי העוגה ומעבירים את העיסה לתבנית
3. מפזרים את פלחי התפוחים מעל העוגה,מערבבים את הסוכר והקינמון של הציפוי וזורים מעל התפוחים.
4. אופים בחום בינוני כ-45 דקות, או עד שהעוגה תזהיב (עוגות תפוחים נוטות להשחים לפני שהן אפויות ואז הן נחרכות קצת,מומלץ להניח מעל העוגה רדיד אלומיניום לקראת סוף האפייה)

נכון קל? ולא תאמינו כמה שלא תרגישו את המיונז
בע"ה אני אפרסם מתכונים נוספים לקראת החג אבל עד אז-בתאבון...

יום רביעי, 10 באוגוסט 2011

lemon-soy sauce chicken cutlets


Enough kugels and quiches!give us meat! ok, because you asked so nicely I have no reason not to share with you this amazingly easy and amazingly delicious recipe. When it comes to poultry, I'm a big chicken breast fan but I have recently discovered that a whole lot of people are not. This recipe is perfect for everyone because it combines the convenience of boneless chicken pieces while actually being made of thighs so all of you dry-phobic people can get your moneys worth. Speaking of money, buying boness chicken thighs can be quite an expensive expedition and you know I wouldn't subject you to that kind of cruelness. That's why I'm here to tell you that you can debone the chicken thighs all on your own and spend that extra money on dessert or something. Here's how: http://allrecipes.tv/videos/how-to-debone-a-chicken-thigh.aspx (you'll thank me later). Obviously, the marinade can be used on other chicken parts- and that includes white meat, if you're brave like me.
Shall we?
Ingredients:
4-8 boneless chicken cutlets
juice of 1 lemon (I won't tell if you use bottled-that would be about a 1\3 of a cup)
3 Tablespoons of soy sauce
salt and pepper to taste
chopped parsley to taste (totally optional)

1. Place chicken pieces in a baking dish in one layer and season with salt and pepper
2. Pour the lemon juice and soy sauce over the chicken pieces
3. Sprinkle parsley if desired
4. Bake uncovered for an hour on medium heat (350 F\ 180 C)

Don't forget to save me some...

יום שני, 4 ביולי 2011

פרגיות בסויה ולימון


נראה לי שמיציתי את עניין הפשטידות לזמן מה, הפעם אני משתפת אתכם במשהו הרבה יותר משמעותי אבל בלי תוספת מאמץ. האמת היא שאת הפרגיות "גיליתי" ממש לא מזמן.כחובבת חזה עוף מושבעת שרק לאחרונה גילתה שהרבה אנשים חושבים שחזה עוף זה עניין יבש מדי לטעמם,פרגיות הן בהחלט מציאה טובה ועסיסית."ומה עם המחיר?" אתם שואלים.ובכן,מסתבר שמכרעיים רגילים לחלוטין אפשר להכין פרגיות טובות לא פחות ממה שימכרו לכם במחיר הרבה יותר גבוה אצל הקצב.כמובן שהייתי מאוד רוצה לספר לכם איך בדיוק עושים את זה אבל הגילוי המרעיש כאן הוא שהמלאכה לא נעשתה על ידי אלא בידי בעלי,שעלול יום אחד לשקול הסבה מקצועית לקצבות בעקבות המשימות הבשריות שאני נוטה להנחית עליו במטבח.בגדול,זה עניין של הפרדת העצם מהעור ומהבשר: מצאתי לכם את הסרטון הזה: http://allrecipes.tv/videos/how-to-debone-a-chicken-thigh.aspx
שמסביר באנגלית איך לעשות את זה אבל טרם מצאתי הוראות טובות בעברית.אם אתם מכירים משהו כזה,אני אשמח לשמוע על כך.
הפרגיות במתכון נאפות ברוטב חמוץ\מלוח שאין קל ממנו.כמובן שאפשר ומומלץ להכין גם עם חלקי עוף אחרים (כולל חזה...אם אתם כמוני ולא מפחדים ממנו)

מרכיבים:
4-8 נתחי פרגיות

מיץ מלימון אחד (שום דבר לא יקרה אם זה משומר-בערך שליש כוס מיץ)
3 כפות רוטב סויה
מלח ופלפל
מעט פטרוזיליה קצוצה (לא חובה)

1. מניחים את הפרגיות בתבנית גדולה בשכבה אחת ומתבלים במלח ובפלפל
2. שופכים מעל חלקי העוף את מיץ הלימון ורוטב הסויה
3.זורים מעל פטרוזיליה אם רוצים
4. אופים ללא מכסה במשך שעה על חום בינוני (180 מעלות)


אל תשכחו לשמור לי קצת...
אה,ולפני שאני אשכח-יש לי מעין טור אוכל באתר "התפריט" ('www.themenu.co.il) ואתם ממש מוזמנים להיכנס אליו ולהתרשם מהמתכונים ומההגיגים.חלק מהמתכונים יהיו מוכרים לכם מהבלוג אבל אני מבטיחה גם הפתעות

יום ראשון, 3 ביולי 2011

Onion kugel

I'm very excited to share with you one of the most frequently used recipes in my kitchen-as it happens, it was also one of the first recipes that I made in my then new kitchen shortly after I got married.It's just one of those recipes that everybody seems to be always looking for: really easy(mix ingredients, pour into pan and bake), really fast and doesn't require any fancy weird ingredients(I'm willing to bet that you all have onions,flour, oil and eggs in your pantry right now).Oh, and it's parve,what more could you ask for?scroll down to the bottom for ways to jazz it up and even make it kosher for Pessach.

Ingredients:
4 chopped onions
2 eggs
6 Tablespoons oil
half a cup of water
1 cup self rising flour (or 1 cup of regular flour+ 1 teaspoon baking powder)
1 teaspoon chicken soup powder and\or 1 teaspoon onion soup powder (optional)
half a Tablespoon of salt (I would add a little less when adding the soup powder)
black pepper to taste
bread crumbs (panko crumbs make a fabulous crispy kugel, but don't fret if you don't have them because regular breadcrumbs will still taste scrumptious)

1. Grease a medium pan (9x13 or whatever) and sprinkle in it a thin layer of breadcrumbs.
2. Mix all of the ingredients in a bowl and pour them into the pan.Sprinkle another thin layer of breadcrumbs on the kugel.
3. Bake at 180 celcius or 350 Fahrenheit for about 30 minutes or until the whole house smells amazing and the kugel is golden brown.

Yaels Krazy Korner:
it's been a while!feel free to add all kinds of things to your kugel like vegetables (zucchini and sweet potatoes are especially recommended) and\or grated cheese, herbs etc. I once turned the kugel into muffins by baking them in a silicone baking pan and they came out great.
My mom even found a great way to make the kugel kosher for Pessach:just substitute 2\3 cup potato starch  and 1\3 cup matzah cake meal for the flour and drop the breadcrumbs.

יום רביעי, 29 ביוני 2011

פשטידת הבצל המפורסמת של ליהיא לפיד בגרסה שלי


קבלו את אחד המתכונים שאני מכינה הכי הרבה: פשטידת הבצל של ליהיא לפיד. כשהתארסתי,שתי חברות טובות מאוד קנו לי את אוסף המתכונים שלה והמתכון תפס לי את העין.זה היה אחד הדברים הראשונים שהכנתי במטבח הקטן שלנו אחרי שהתחתנו.הייתי בטוחה שמצאתי פה אוצר נדיר אבל שיטוט מהיר בבלוגים ובפורומי אוכל שונים מגלה כי בערך חצי מדינה מכינה את הפשטידה באדיקות רבה ובגרסאות שונות.יש כאלה שמוסיפים לה קישואים,בטטות,גבינות...גם אני שיניתי קצת את המתכון המקורי אבל לא סטיתי ממנו הרבה-בסך הכל הוספתי קצת תיבול,הורדתי קצת שמן ותגברתי את רמת הקריספיות. תכל'ס, מדובר במתכון מהסוג שכמעט כולם מחפשים: הוא קל נורא (מערבבים את החומרים,שופכים לתבנית ואופים),מהיר הכנה מאוד ולא דורש חומרים גרנדיוזיים (תודו שיש לכם בבית בצלים,קמח,שמן,ביצים ואבקת אפייה).אה,וזה גם פרווה.צריך יותר מזה?

מרכיבים:
4 בצלים קצוצים
2 ביצים
6 כפות שמן
חצי כוס מים
כוס קמח תופח או כוס קמח רגיל+ כפית אבקת אפייה
כפית אבקת מרק עוף ו\או אבקת מרק בצל (לא חובה אבל מאוד מוסיף)
כפית וחצי מלח (אפשר להוסיף קצת פחות אם שמתם אבקת מרק)
פלפל שחור לפי הטעם
פירורי לחם


1. משמנים תבנית 26 וזורים בה שכבה דקה של פירורי לחם
2. בקערה מערבבים את כל החומרים ושופכים לתבנית
3.משטחים את העיסה בתבנית בצורה אחידה ומעליה זורים עוד שכבה דקה של פירורי לחם
4. אופים בחום בינוני (180 מעלות) עד שהבית מתמלא בריח מעולה והפשטידה מוצקה וזהובה (בערך חצי שעה)

פינת ההתפרעות של יעל:
זה לא היה הרבה זמן!אז כמו שאמרתי,אפשר להוסיף לפשטידה כל מיני ירקות,גבינות ועשבי תיבול.משהו אחר נחמד מאוד שניסיתי פעם זה להכין את הפשטידה כמאפינס בתבנית שקעים מסיליקון.יוצא מעולה!


יום רביעי, 22 ביוני 2011

Salmon loaf

Fish is definitely not one of my strong points...in eating as well as cooking.But I've noticed that I'm not alone-a lot of people get a bit queasy when it comes to fish: okay, most of them are kids and random people with an exceptional sense of smell but you know what I mean.It's just one of those things that is hard to be indifferent about...you probably either love it or you hate it.Me? I'm just swimming along between the two trying to figure it out.In the meantime, here's a family recipe that isn't too fishy but just fishy enough.

Ingredients:
1 can (about 7 oz.) canned pink salmon
3 grated carrots (optional, but they add lots of color and taste.And Mom would approve because they're good for you.However, it is your right to determine that the salmon to itself is healthy enough and skip the veggies)
1 grated onion (do your eyes a favor and grate it in a food processor.Trust me)
1 egg
1\2 a cup of breadcrumbs
1\2 a cup of milk or water
1 Tablespoon of oil
black pepper to taste
1 Tablespoon of ketchup

1.Drain the salmon and remove any skin and bones that may be lying around (don't say I didn't warn you)
2.Scrape the salmon into a bowl and flake it,add the rest of the ingredients and combine them all together.
3.Grease a large loaf or square pan and pour the salmon mixture into it.
4.Bake at 350 for an hour or until loaf is golden brown.

Tastes great cold, in sandwiches, as part of a buffet or whatever.Enjoy!

יום שלישי, 21 ביוני 2011

פשטידת סלמון


אוקיי,אז אני מודה:דגים הם ממש לא התחום החזק שלי-לא בבישול ולא באכילה.בכלל,שמתי לב שדגים זה משהו שרוב האנשים אוהבים מאוד או שונאים נחרצות-אין כזה הרבה מרחב תמרון בין שתי הקצוות.בניסיון להשלים בכל זאת עם בעלי הסנפיר והקשקשת אני מוצאת את עצמי עם מתכוני דג מאוד פשוטים.המתכון שלפניכם הוא נורא נחמד וקליל,והדבר הכי קשה שתצטרכו לעשות בשבילו זה למצוא קופסת שימורים של סלמון במיץ.כן, קראתם נכון: לא פילה ולא דג שלם אלא קופסת שימורים שמזכירה קצת קופסת שימורים של טונה.אני מודה שהמתכון הזה לא משתייך לקטגוריית ה"כל החומרים נמצאים במזווה שלכם כבר" ושהמצרך הזה לא נמצא בכל מכולת שכונתית והוא אולי ידרוש מכם קצת מאמץ אבל אני מבטיחה שכשתכינו-תבינו.אני מבטיחה גם לשים עוד מתכונים (בעתיד,בע"ה) עם המוצר הנהדר הזה על מנת לגוון לכם את מקורות האומגה 3.

מרכיבים:
קופסת שימורים אחת (213 גרם) של סלמון (או: אלתית ורודה במיץ טבעי,למי שלא רוצה לגרום לאליעזר בן יהודה להתהפך בקברו)
3 גזרים מגוררים (לא חובה ואפשר להשמיט,אבל מוסיף הרבה צבע,טעם,בריאות ומה לא)
בצל אחד מגורר (תעשו לעיניים שלכם טובה ותגררו אותו במעבד מזון)
ביצה אחת
חצי כוס פירורי לחם
חצי כוס חלב או מים
כף שמן
פלפל שחור לפי הטעם
כף קטשופ

1.מסננים את הדג מהמים ומוציאים עצמות ועור (אם יש...אל תגידו שלא הזהרתי אתכם)
2. שמים את הדג בקערה ומועכים אותו קצת
3.מוסיפים את שאר המרכיבים ומערבבים
4.משמנים תבנית (אפשר 26,מרובעת או אינגליש קייק גדולה קצת) ושופכים את התערובת פנימה.
5.אופים בחום בינוני כשעה או עד שהפשטידה מזהיבה

נהנתם?תגידו יפה תודה לאימא וסבתא שלי,שזה המתכון שלהן כעיקרון.הפשטידה מצוינת גם קרה (יש לא מעט שאפילו מעדיפים אותה ככה) ואפשר בכיף להקפיא אותה.

תגובות,אנשים,תגובות!אני ממש רוצה לשמוע הארות,הערות ותובנות...

יום שלישי, 14 ביוני 2011

honey-mustard sweet potatoes

It's been a while...but I'm back with a sunny and fun recipe for those of you who are looking for a good side dish recipe to add to your collection-and we all know that you can never have too many of those.Honey mustard is a pretty classic combo and it's threatening to become as popular as, shall we say- peanut butter and jelly or lettuce and tomato-seriously!I found this recipe on a website a few years ago as honey-mustard potatoes and they became a big hit around the house.After a few months of basking in the glory I thought about mixing things up with sweet potatoes instead.We liked them a lot, but hey-don't take my word for it, try them yourselves...


Ready?

Ingredients:
4 tablespoons of  mustard (do yourselves a favor and go for the good kind, not the plastic-y hot dog-y kind)
4 tablespoons of honey
5 tablespoons of oil
1.5 kilos of sweet potatoes (about 5), peeled and sliced
salt and pepper to taste

1.Place sweet potato slices in a large bowl and heat oven to 200 celcius or 400 Fahrenheit
2.Pour the rest of the ingredients on the sweet potatoes (Yaels tip that will save you a dish:pour the oil before you measure the honey and that way it won't stick to the spoon and you won't have to wash another dish.You'll thank me later).Mix thoroughly until sweet potatoes are covered with seasonings
3. Pour onto baking paper covered or greased pan (your best bet is to make sure that the sweet potatoes are all in one layer to ensure even baking)
4.Bake for about 50 minutes, or until the sweet potatoes are soft and golden 
Yum!share with me!


בטטות בחרדל ודבש


עברו הרבה מים בכנרת מאז הפעם האחרונה שכתבתי פה (המממ...או שלא) אבל אולי חלקכם שמתם לב שהבלוג הוא כבר לא הפורקן הקולינרי היחיד שלי-בשעה טובה התחלתי גם לכתוב טור באתר "התפריט" ואתם כמובן מוזמנים להיכנס אליו מדי שבוע ולקרוא עוד מתכונים והגיגים מפרי מקלדתי ומצלמתי (www.themenu.co.il). זה כמובן לא אומר שאני מזניחה את הבלוג-אם תיכנסו לטור תראו מתכונים מוכרים וגם כאלה שלא.אז כדאי לכם להיכנס. בכלל, זה אתר מאוד נחמד-יש שם כל מיני מתכונים וכתבות על מסעדות ותזונה וכאלה.זה רלוונטי במיוחד למי שגר באזור באר שבע כי יש שם המלצות על מסעדות ועסקיות אזוריות אבל גם מי שלא גר באזור יכול למצוא שם דברים מעניינים.
חזרה לאוכל-החברים של הבלוג בפייסבוק יודעים שלאחרונה אני מביאה כמה אופציות לרשומה הבאה שתתפרסם אז כדאי לכם להצביע ולהכריע.
חרדל ודבש הוא שילוב די קלאסי שמופיע בהמון מנות כמו ויניגרטים לסלטים ומאכלי עוף למיניהם.לפני כמה שנים מצאתי באתר אמריקאי מתכון לתפוחי אדמה בחרדל ודבש וראיתי כי טוב-המתכון כיכב אצלנו כמעט בכל שבת למשך כחצי שנה(!) ואז משום מה הזנחתי אותו.לפני כמה חודשים חזרתי לאתר ונזכרתי במתכון אבל נחה עליי רוח אמיצה משהו והחלטתי לנסות את זה עם מאכל שגם הוא משתדך מעולה עם דבש-בטטות.ההצלחה הייתה רבה והנה התוצאות לפניכם.מדובר בתוספת קלילה ונחמדה שתוסיף מתיקות ופיקנטיות (או חריפות-תלוי באיזה סוג חרדל עושה לכם את זה...אבל תעשו טובה ותזהירו את האורחים-במיוחד אם מדובר בילדים)לכל ארוחה.כמובן שאפשר גם עם תפוחי אדמה ואולי גם עם ירקות אחרים-תנסו ותגידו לי מה ואיך יצא

רכיבים:
רבע כוס חרדל (דיז'ון,כן?החרדל של הנקניקיות נותן לזה קצת טעם זול ופלסטיקי)
רבע כוס דבש
5 כפות שמן קנולה
קילו וחצי בטטות קלופות וחתוכות לקוביות גדולות
מלח ופלפל לפי הטעם

1. מניחים את קוביות הבטטות בקערה גדולה ומחממים את התנור ל-200 מעלות
2. שופכים עליהן את שאר המרכיבים (קבלו טיפ בנוגע לדבש:אם קודם תמדדו את השמן ואז באותו הכלי תשימו את הדבש הוא לא יידבק לכם לכלי.מומלץ לכל מתכון שבו יש שמן ודבש) ומערבבים היטב עד שכל הקוביות מכוסות בכל חומרי התיבול
3.מעבירים לכלי משומן,רצוי שתהיה רק שכבה אחת של בטטות על מנת להבטיח אפייה שווה, ואופים במשך כ-50 דקות או עד שהבטטות רכות וקצת שחומות

זה הכל!בתאבון!ואל תשכחו להתחבר אליי בפייסבוק על מנת להכריע מה תהיה הרשומה הבאה!

יום שלישי, 17 במאי 2011

Chocolate mousse- eggless, butterless and gelatin free

so what the heck is in it?
CHOCOLATE! isn't that why you would want to eat it in the first place? Stay tuned for fun ways to upgrade your mousse at the bottom, too.
First thing's first: I want to dedicate this post to CR who recently got engaged to S and she is one of my devoted readers and a big chocolate fan (in case you were wondering why we're friends)-only the best to both of you!
OK, on to the recipe-
Before I became pregnant with Mr. baby (who has recently morphed into Mr. toddler- what the heck?) I used to make a different chocolate mousse which was notoriously fabulous but boasted raw eggs. At the beginning of the pregnancy,as part of my obsession with reading all things baby I discovered that raw eggs are really not recommended for pregnant women. WHAT????how am I supposed to get embaressingly fat if I can't eat rediculously unhealthy foods like chocolate mousse? Desperate, we sought out the gynocologist who had bursted many a pregnancy related myth (metal detectors really don't do any harm-who knew?) but unfortunately this was no myth: "let's put it this way" said the doctor "I got my mom to ditch her raw egg laden chocolate mousse recipe...get the picture?".
Darn it, now what? the only way to have a healthy baby but simultaneously maintain happy parents would be to find a different recipe.Who knew that the least guilt trip laced one would also be the easiest one? (btw-the best one too):

Ingredients: (about 4-6 servings, try not to finish the whole thing by yourself)
100 grams bittersweet chocolate (I'll admit that I too occasionally succumb to the whole "no less than 60% cocoa" chocolate fad because the results are yummy.If you have access-go for it, but if not don't sweat it because you can still make really great mousse with slightly lower quality chocolate)
1 container (250 m"l) whipping cream

Break the chocolate into pieces and melt them in the microwave or in a bowl on top of a pot filled with boiling water (make sure the water doesn't touch the bowl with the chocolate in it).In a seperate bowl whip the cream.Allow the melted chocolate to cool a little and fold into the whipped cream. Cover with plastic wrap (or spoon into individual bowls\glasses and then cover with plastic wrap) and chill at least 4 hours before serving.Ta dah!easy, right? yet incredibly rich and yummy.
* If you choose to use non-dairy whipped cream and notice a bit of an after-taste add a few drops of vanilla extract and a pinch of sugar, or just add a teaspoon of vanilla sugar.You can also do this if you feel that the mousse isn't sweet enough for your taste

Yaels krazy korner:
is plain chocolate mousse a little too "been there, done that" for your taste?try these fun twists:
chocolate caramel mousse:melt the chocolate according to the original instructions but before whipping the cream set about 1\2 a cup aside.In a small saucepan melt 1\2 a cup of sugar and when it begins to carmelize add the reserved cream and set the flame on low.Mix thoroughly until combined and remove from heat (there may be small sugary chunks left and that's cool).Beat the caramel with the melted chocolate until combined (be careful-it's hot and may spray).Fold into the whipped cream and chill as above.
mocha chocolate mousse:follow standard directions but before chilling the mousse dissolve one tablespoon of powdered coffe in 1\4 cup hot water and fold thoroughly so as not to dilute the mousse.


I want to know how it came out! don't forget to comment and have a chocolate-y day!
יום רביעי, 11 במאי 2011

מוס שוקולד- בלי ביצים, בלי ג'לטין ובלי חמאה

אז מה כן יש בו?


רק מה שבאמת צריך בשביל שיהיה מוס שוקולד נהדר! כלומר, בעיקר שוקולד ושמנת אבל אל דאגה, יש גם שדרוגים שונים בהמשך.
לפני שנתחיל, אני רוצה להקדיש את הרשומה הזאת לחברתי היקרה מאוד מאוד ח.ר. שהתארסה השבוע עם בחיר ליבה ש. והיא קוראת ותיקה של הבלוג. אה, והיא מאוד אוהבת שוקולד (עכשיו ברור למה אנחנו חברות?). אז רציתי לאחל להם מזל טוב עצום במיוחד ושיזכו להקים בית מקסים מלא בכל הדברים הטובים ביותר.
בנימה חגיגית זו, בואו נעבור למתכון-
האמת היא שלפני ההריון של הנסיך נהגתי להכין מוס אחר,נהדר במיוחד המורכב בין היתר מביצים חיות. בתחילת ההריון,במסגרת האובססיה שלי לקרוא כל פיסת מידע בנושא גיליתי שביצים לא מבושלות יכולות להיות מאוד מסוכנות לנשים הרות. מה? איך אמורים להשמין בזמן ההריון אם לא נוכל לאכול יומם ולילה דברים משמינים אבל נפלאים כגון מוס שוקולד????? בעיניים כמעט דומעות ניגשנו לרופא הנשים שעד השלב ההוא שבר לנו הרבה מיתוסים בנושא ההריון (הידעתם שאין באמת בעיה לעבור בגלאי מתכות בזמן ההריון?) "נכון שזה שטויות העניין של הביצים הלא מבושלות? אין עם זה באמת בעיה,נכון?"
אז מסתבר שדווקא יש בעיה,רצינית לא מעט.
"בואו נגדיר את זה ככה" אמר הדוקטור "אני גרמתי לאימא שלי להוציא את המוס שלה מהבית, ובפירוש מדובר במוס הכי טעים בעולם.ודי לחכימא ברמיזא"
אבלים וחפויי ראש חזרנו הביתה ואני ניגשתי למלאכה החדשה: מציאת מתכון למוס שוקולד שלא יפגע בעובר אבל גם יעניק טעם לחייהם של הוריו. מסתבר שזו הייתה משימה יותר קלה ממה שחשבתי והנה לכם הממצאים-מי היה מאמין שהמתכון הכי טוב הוא גם הכי פשוט?

מרכיבים: (בערך 4-6 מנות)
100 גרם (חפיסה אחת) שוקולד מריר (אני מודה שגם אני מתפתה מדי פעם לטרנד ה"שוקולד רק עם מינימום 60% מוצקי קקאו" כי זה באמת יוצא נהדר אז אם יש גישה לשוקולד כזה-לכו על זה. אבל אם לא, אל תשברו את הראש-גם עם שוקולד בעל פחות מוצקי קקאו ייצא לכם מוס סבבה)
מיכל אחד (250 מ"ל) של שמנת מתוקה או צמחית פרווה

שוברים את השוקולד לקוביות וממיסים אותם במיקרוגל או בבן מארי (בקערה או סיר מעל סיר אחר עם במים רותחים. לוודא שתחתית הקערה או הסיר עם השוקולד לא נוגע במים). בקערה נוספת מקציפים את השמנת לקצפת יציבה. מניחים לשוקולד להצטנן קצת ומקפלים אותו בעדינות לתוך הקצפת. מכסים את הקערה (או מעבירים לכלי אחר או לכלים אישיים) ומקררים לפחות 4 שעות לפני ההגשה. זהו!פשוט, נכון?אבל לא תאמינו כמה אוורירי וטעים זה יוצא

* אם משתמשים בקצפת צמחית ומרגישים שיש קצת טעם לוואי או שסתם רוצים מוס קצת מתוק יותר אפשר להוסיף קמצוץ סוכר וכמה טיפות תמצית וניל, או במקום פשוט להוסיף כפית סוכר וניל

פינת ההתפרעות של יעל:
הבטחתי שדרוגים ואני מקיימת!כמובן שהמוס הזה נהדר סתם ככה אבל למי שרוצה קצת טוויסט הנה כמה רעיונות:
* מוס שוקולד קרמל: ממיסים את השוקולד כמו במתכון הרגיל אבל לפני שמקציפים את הקצפת שופכים רבע עד חצי כוס ממנו לכלי אחר ושומרים בצד. בסיר קטן ממיסים חצי כוס סוכר לבן וכשהוא מתחיל להפוך לקרמל (עניין של כמה דקות-תשגיחו על הסיר כדי שלא תפספסו את זה) מוסיפים את השמנת לסוכר השרוף (זהירות-זה יכול להשפריץ!) ומערבבים היטב. כשנוצר קרמל אחיד למדי מכבים את האש (אם יישארו גושים קטנים לא נורא-הם יהפכו למעין סוכריות קרמל קטנות שנורא כיף לפגוש אחר כך במוס שלכם). מערבלים את הקרמל כמה דקות עם מערבל ומוסיפים אותו לשוקולד המומס.מערבלים שוב עד שהכול מתאחד ומקפלים לתוך הקצפת. מקררים כמו במתכון הסטנדרטי. המתכון מבוסס על מתכון של איילת הירשמן
* מוס שוקולד מוקה: מכינים את המוס כמו במתכון הסטנדרטי אבל לפני שמכניסים אותו למקרר ממיסים כף אבקת קפה (נמס או מגורען) ברבע כוס מים ומקפלים אותו היטב למוס שלא יהיה מדולל.בתיאבון!


תספרו לי איך יצא! אפשר כמובן כאן בתגובות ואפשר בפייסבוק- תחפשו את "תנסו את זה בבית" ותתחברו אליי! תהיו הראשונים לדעת על רשומות חדשות ותוכלו להכריע מה יתפרסם בעתיד!

יום שני, 4 באפריל 2011

not-too-fattening pancakes


Pancakes, without a doubt, belong in a category of foods labeled "go ahead, I dare you to find someone who isn't a fan".I'll admit, it's a small club-and this is coming from someone who,as a picky eater, has challenged this club many a time-but pancakes?possibly one of the most kid-friendly foods around?as an added bonus, they're incredibly easy to make and they don't require any fancy ingredients-in fact, I'll bet that everything you need to make a fluffy batch of pancakes is in your kitchen right now.Of course, nothing is stopping you from adding whatever your little heart desires to the batter: fruit, cinnamon, chocolate chips (personal recommendation-try white chocolate chips.BUT! if you plan on serving them to guests don't forget to fill them in on what's inside or they might think it's just raw batter.True story).Honestly, be creative and feel free to add all kinds of goodies to your pancake batter (hmmm, I wouldn't recommend anchovies, but you get the picture).
Those of you who are concerned with my no-frying reputation:at ease!what's great about these pancakes is the fact that they have very little fat ( a big thanks to Mom for the recipe-though as usual, I'll admit I did a bit of tweaking)but are still fried with no oil\butter and such.The secret is using a Teflon or another kind of no-stick pan:I mean it!don't try to use a regular pan or you'll have to resort to the regular frying method.
Shall we?

Ingredients:
3 Tablespoons of sugar
2 Tablespoons of oil (I prefer Canola)
1 egg
1 small package of baking powder (about 1 Tablespoon)
2 cups of flour
milk-you'll probably need about a cup but add gradually because sometimes less is enough

1. Combine all ingredients and mix until batter is smooth and lump-free
2.Heat a Teflon frying pan without oil and with a spoon or ladle pour a few tablespoons at a time into the pan (my pan won't hold more than three pancakes at a time, but maybe yours does).I prefer small pancakes because they're cute and usually take less time to get done but DH prefers big ones that take up the whole pan.When the batter starts bubbling turn the pancakes over with a spatula.Continue cooking on second side for another 3-5 minutes and then carefully remove pancakes to a serving plate.Repeat with remaining batter.
3.Eat!pancakes make a great breakfast,light supper or whatever!serve with honey, maple syrup or-as purists like me prefer them-on their own.
Happy spring!